
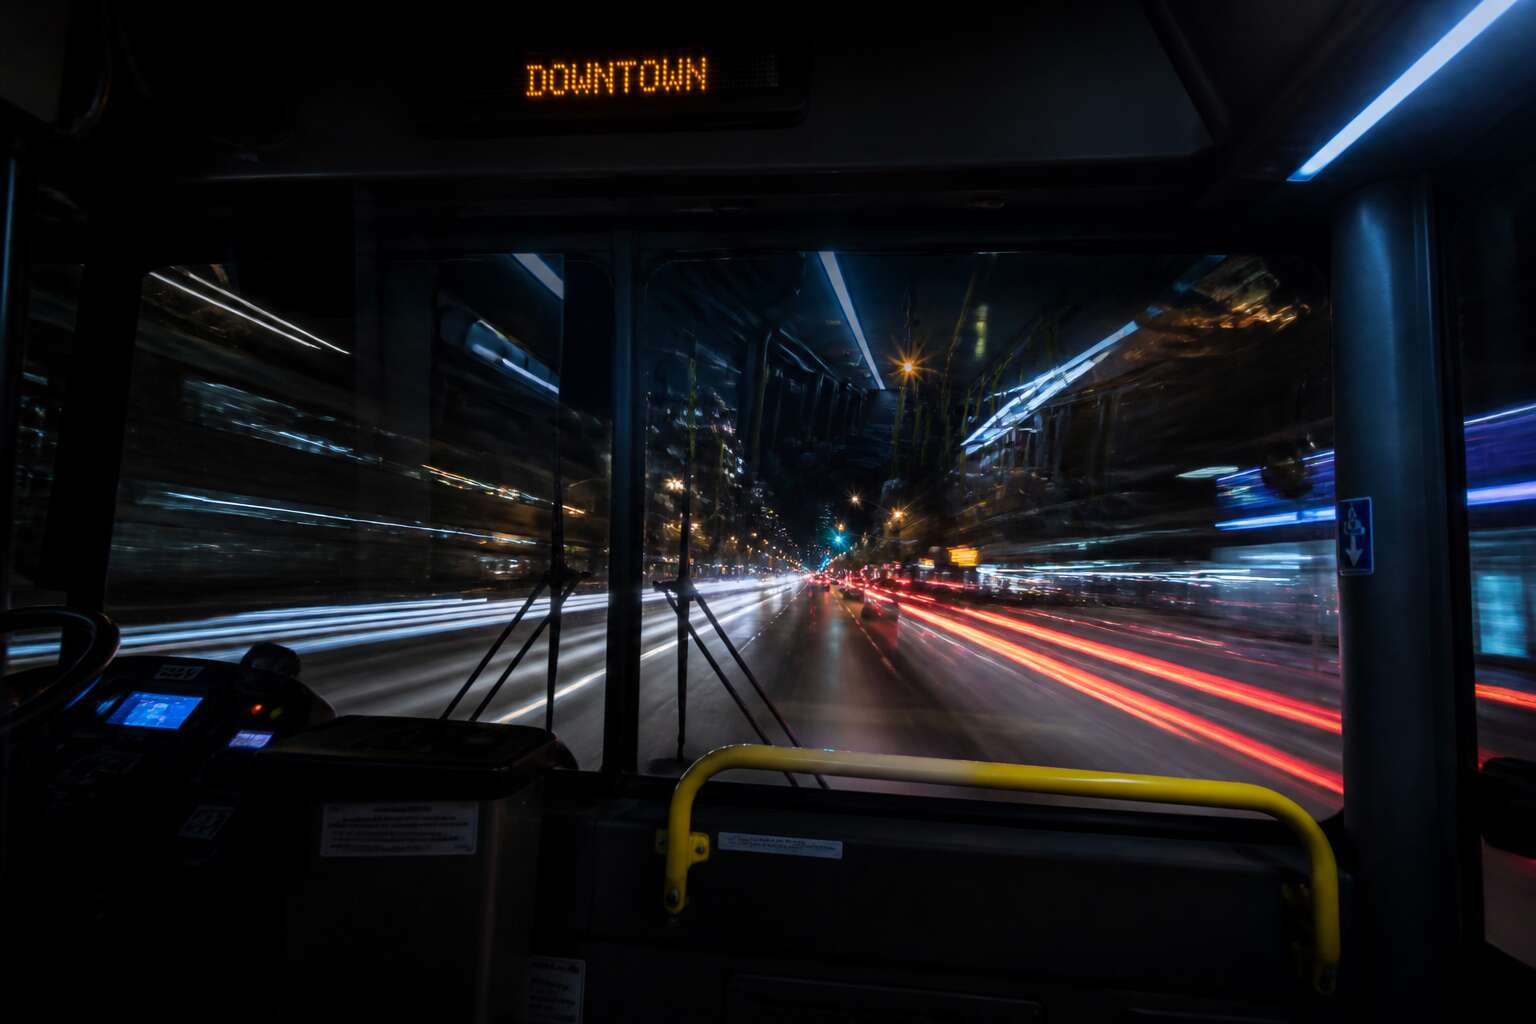
Planning Your Overnight Bus Adventure
Choosing the Right Route for Night Travel
The choice of route for an overnight journey is not merely a matter of distance, but a calculation of terrain, rest stops, and the elusive quality of sleep. In South Africa, the N1 and N3 corridors offer distinct nocturnal experiences. The N1’s flat expanse can induce a hypnotic monotony, whereas the N3’s winding descents through KwaZulu-Natal demand constant driver vigilance, which translates to more frequent braking. This mechanical interruption is your primary foe when you need uninterrupted slumber. You must consider the timing of scheduled comfort stops, as these are the hidden anchors of your night. A well-placed halt can mean the difference between a fragmented doze and genuine restoration.
Before you commit to a ticket, scrutinise the operator’s itinerary for the specific overnight hours. Some routes are bookended by lengthy depot waits. Others boast seamless connection points. This is where a bit of research transforms a gamble into a certainty. Pay attention to which side of the bus faces the sunrise, as the morning glare can cut your sleep short by an hour.
– Check if the bus has a dedicated restroom, as this reduces disruptive mid-journey stops.
– Confirm if the vehicle makes a border or toll gate pause that falls during your peak sleep phase.
– Look for the operator’s track record with punctuality, as a late departure erodes your rest time.
A carefully chosen route for your bus travel night video should, paradoxically, aim for utter uneventfulness. The ideal night is one where the driver’s rhythm is steady, the passengers are quiet, and the only thing breaking the dark is the occasional flash of a distant farmhouse. The best planning ensures that the very act of travel becomes a passive, almost cinematic experience, allowing you to wake refreshed at your destination rather than battling fatigue for the entire following day. After all, the scenery outside is lost to the dark, so your only investment is the quality of those blank hours.
Selecting the Best Bus Company for Long Hauls
The real journey begins before you board, when you select the operator who becomes the custodian of your night. A company that prioritises sleeper infrastructure over passenger volume understands that a bus travel night video is only watchable if the passengers inside are at peace. You can read countless reviews, but the most telling indicator is the average age of their fleet. Older coaches often rattle at speed, and that vibration travels straight through the upholstery into your spine.
Consider the crew rotation policies. A driver who has been on the road for ten hours should not be your pilot at midnight. The best companies guarantee a second driver for journeys exceeding a certain distance, and they log those hours diligently. This commitment shows in the smoothness of the ride.
1. Inspect the seat pitch before you book. A 72-inch pitch offers a reclined position that mimics a bed, while a standard 68-inch pitch leaves you sitting upright all night.
2. Look for operators that provide a pre-departure lounge, as this allows you to board calm and settled rather than rushing from the ticket counter.
3. Check whether the bus has a refreshment attendant, which signals that the company invests in passenger comfort rather than just fuel efficiency.
The psychological quality of the cabin matters even more than the physical. A bus filled with tourists carrying loud conversations and bright phone screens can ruin your night faster than a rough road. Good operators stagger their departures to group passengers by destination, which often leads to a quieter, more homogeneous crowd. That silent cohesion is the difference between a restless night and a deep, restorative sleep. When you finally review your own bus travel night video, you want to see calm faces, not a cabin of irritated commuters.
Packing Essentials for a Night Ride
At 11 PM, the bus terminal smells like diesel and anxiety. What you pack determines whether that anxiety follows you to your seat. The sleep mask blocks the glare of passing headlights. Earplugs silence the engine’s persistent hum. Layers become a makeshift blanket when the air conditioning runs cold.
Pack for your specific anxieties, not generic checklists. I have found that a familiar scent or a worn jumper calms you when the darkness outside dissolves all sense of place. Charge your devices before boarding; a dead phone at 2 AM is a vulnerable feeling.
The best bus travel night video captures passengers who prepared properly. Their calm shows in their posture.
Consider these essentials:
- A neck pillow that supports forward sleeping
- Moisturising wipes for the grime of travel
- Compression socks to keep circulation moving
Packing well is a quiet promise to your future self that you will arrive intact.
Safety Tips for Solo Night Travelers
Tell the driver where you plan to get off, and text the bus number to someone you trust. This is the least romantic thing you will do all week, but it is also the most responsible. A shared location pin is worth more than a hundred good intentions when the bus pulls into a dark, unfamiliar rank at 3 AM. A solo traveler who looks like they know where they are going is a less attractive target. Sit near the driver if the bus is quiet, and keep your bag on your lap, not in the overhead rack where you cannot see it. The person two rows back should not know your name, your stop, or your business.
The bus travel night video that documents a smooth solo journey is usually the result of invisible planning. It is the passenger who checked the bus company’s safety record, who noted the emergency exits, who read the reviews mentioning sketchy stops. You cannot scout a route from your phone once you are moving. Do your reconnaissance before boarding. Watch for drivers who seem rushed or dismissive, as that energy often carries into their driving. Keep a power bank within reach, not buried in your luggage, and keep your phone on silent but visible. A flashing screen in a dark cabin is a beacon. Do not be the beacon.
– Keep your valuables in a cross body bag, nothing fancy, something you can sleep on
– Choose a window seat to control who sits next to you
– Set a silent alarm for 15 minutes before your stop, so you wake with time to gather your things
Trust your instincts when the bus stops for a break. If the area feels wrong, stay on the bus and stretch in the aisle instead. The driver waits for stragglers, but the engine idles with a kind of impatience. You are not being rude by staying put. You are being practical. The bus travel night video that shows a passenger disembarking at a badly lit stop is not the one you want to star in. There is no shame in going an extra stop and taking a metered taxi back. It costs more, but it costs less than a lost phone or worse. Carry a small torch, not your phone flashlight, to light the path from the bus to your door. It frees your hands and keeps your phone’s battery in reserve. The journey ends when you lock the door behind you, not when the wheels stop turning.
Capturing Stunning Footage in Low Light
Camera Gear That Performs Well After Dark
Capturing a bus travel night video that doesn’t dissolve into murky shapes requires more than a steady hand. The N3 between Johannesburg and Durban is especially punishing after sunset, with unlit stretches that challenge even professional sensors. Most compact cameras fail here, producing noisy, soft footage that loses the texture of the road.
The primary battle is motion blur from the bus vibrations and your own handheld movements. A lens with a wide aperture, like f/1.8 or faster, lets you keep shutter speeds quick without boosting ISO to unusable levels. For most passengers, the ideal setup is a mirrorless camera with in-body stabilisation, paired with a prime lens. Smartphones have improved, but their tiny sensors still struggle to separate dark road from passing headlights.
When the bus rolls through rural areas, the difference between a clean image and a ruined clip comes down to dynamic range. Cameras with larger sensors, such as APS-C or full frame, retain detail in the deep shadows while preventing streetlights from blowing out. If you are committed to the craft, a fast 35mm lens on a full frame body is the standard for this work.
– Look for cameras with dual native ISO, which reduce noise at higher sensitivities.
– A gimbal helps, but only if the stabilisation in your camera is weak.
– External recorders with a high bitrate preserve more colour data for post production.
Your success also hinges on where you sit. The front row above the driver offers a clear view through the windscreen, but the glare from the dashboard instruments can contaminate your exposure. A lens hood and a variable ND filter are cheap insurance against these issues. For bus travel night video, the gear matters less than your ability to adapt to the constant changes in ambient light.
Mastering Manual Settings for Dim Scenes
Night transforms the bus into a moving theatre of shadows, and the most compelling bus travel night video emerges not from expensive glass but from your command of the camera’s manual functions. Auto modes will betray you. They chase the brightest light source, often the streetlamp or an oncoming truck, and crush everything else into formless black.
You must stop trusting the meter and start reading the scene. In the dim cabin, set your aperture wide and your shutter speed to the reciprocal of your focal length to eliminate the worst of the jitter. The ISO is your only flexible ally. Bump it until the noise floor becomes acceptable. The moment a bus pulls into a dark petrol station forecourt, the light ratios flip dramatically. Your eye adjusts, but the sensor needs your guidance. Crank the exposure compensation, or better yet, switch to full manual and hold the settings you know work for that specific sodium lamp glow. This is where a zebra pattern overlay, if your camera has one, becomes invaluable. It shows you where the highlights clip without guessing.
There is a particular rhythm to the N3 at night, a pulse of highway lights and sudden rural darkness. A bus travel night video captures that pulse only when you anticipate it. I find myself watching the road ahead for the reflection of the headlights on distant road signs. That glow is your cue to adjust the exposure before the bus reaches the sign, not after. Relying on the autofocus in this scenario is a gamble. The system hunts in low contrast. Switch to manual focus and preset it to the hyperfocal distance. Everything within that range stays sharp, allowing you to concentrate on the exposure triangle instead of the focus ring. It feels counterintuitive to lock the focus when the bus is moving, but the distance to the road remains constant. The variables are the light, not the depth.
The deliberate actions you need to master are few, but they are critical. I use a method to keep the process quick, because pausing to fiddle with menus costs you the moment.
1. Pre-set your white balance to incandescent or fluorescent, depending on the bus’s interior lighting, to avoid a yellow or sickly green cast.
2. Use back-button focus to decouple the focus function from the shutter release, freeing your thumb to override the AF quickly.
3. Dial in a fixed ISO of around 3200 or 6400 for most unlit sections, rather than letting the camera sweep through the range.
Stabilization Tricks for a Moving Vehicle
The smoothest shot never takes a tripod. On a night bus, the body is a damper. The road transfers a series of jolts through the lane and the floor. For a bus travel night video, I brace my arms against the seatback and press the camera into a rolled duffel. That creates a low contact pivot that absorbs the high frequency chatter through the joints rather than the lens.
Sit near the center of the coach. The rear axle throws a constant kick, and the front section carries the driver’s aggression. Fewer than twenty seats away, the motion flattens to a slow pitch.
I use the bus’s own calm points. When the driver lifts the throttle, the drivetrain releases tension. That is my shutter moment. I fire two static frames. The pulse comes back at the next gear change. Your own breath creates the same effect. Exhale, wait, then record.
Composing Shots Through the Window
The window becomes a lens of its own, but only if you learn to read what rushes past. For a bus travel night video, the glass reflects everything. Your own cabin lights will wash out the landscape if you let them. Press your face close to the pane, cup your hands around the eyepiece, and block the stray glow. That small act of shielding is the difference between a mirror and a window.
Outside, the world offers its own rhythm. A distant farmhouse blinks amber. A petrol station flings white fluorescence across a patch of gravel. The road signs are silver flashes, gone before you can breathe in. Do not chase them. Instead, let the bus do the work. Hold your frame steady and allow the scenery to move through it. The motion is the story.
I find that the darkness forces a kind of patience. You cannot fix what you cannot see. So you adapt, you anticipate, and you trust the slow drift of the highway. Consider what the night gives you:
– The long sweep of a headlight beam over a dry veld
– The silhouette of a lone acacia against a navy sky
– The sudden, unexpected cluster of township lights on a hillside
These are the moments that reward a slow shutter and a steady hand. The window is your canvas, but the bus is your tripod. The hum of the engine becomes a metronome. Each gentle sway of the carriage is a chance to recompose. I wait for the bus to settle into a long curve, then I shoot. The result is a frame that feels both moving and still.
The low light will test your nerve. Grain creeps in like static on an old radio. Yet that grain has texture, a kind of honesty that daylight cannot fake. I embrace it. The blur of a passing truck, the smear of a streetlight, the cyan stab of roadside signage: these are the honest marks of the road. A bus travel night video thrives on these imperfections. They are proof that you were there, tucked into a vibrating seat, watching the country slide by in pieces. The night is not empty. It is merely selective about what it reveals.
Focusing Techniques in Near-Darkness
Autofocus struggles in near darkness because every surface looks the same. On a bus travel night video, I switch to manual focusing and use whatever light exists. A roadside reflector catches a passing headlight. That small glow gives me a target. I set focus on it, then wait for the scene to move into range. Sometimes I use a torch to briefly illuminate a bush or pole. The viewfinder shows noise, but the shape still matters.
Here is what I rely on:
- Focus peaking on a bright sign or a star
- Locking onto a distant truck’s taillights
- Prefocusing at a set distance and letting the bus do the rest
The near darkness changes how I work. I trust the focus ring more than the sensor. When the bus hits a dip, everything blurs, so I reset quickly. A bus travel night video is a sequence of small resets.
Storytelling Through Nocturnal Landscapes
Documenting City Lights and Passing Towns
The highway becomes a storyboard after dark. Every town you pass writes its own chapter in sodium orange and neon blue. I have spent hours shooting a bus travel night video, watching small dorpies blink past. The lens captures what the eye barely registers: a petrol station’s lonely glow, the last lights in a farmhouse window, the sudden flare of an oncoming truck.
Forget the landmarks. The deepest narrative lives in the spaces between them. Those dark intervals and unlit stretches give your bus travel night video its rhythm. City lights build anticipation, then the darkness lets the viewer breathe before the next town arrives. Passing towns at speed creates a natural montage, each settlement a vignette connected by the hum of the engine. Stay patient and let the story unfold at the bus’s pace!
Capturing the Mood of a Sleeping Highway
There is a strange intimacy in watching a highway fall asleep. The last bakkie disappears, the toll plaza empties, and the tar stretches ahead like a dark ribbon. A bus travel night video thrives on these quiet hours. The landscape becomes a series of whispered scenes: a koppie silhouetted against deep indigo, a wind pump turning without purpose, a single security light guarding a farm gate.
The mood shifts with every kilometre. Some stretches feel suspended, as if the world has paused. Others hum with distant activity, a container truck’s glow, a rail crossing’s blinking signal. The sleeping highway does not need drama. It needs patience. I let the camera sit with the darkness, allowing the dim shapes to tell their own story. That is where the real journey lives!
Incorporating On-Board Interactions
At midnight, the N3 between Durban and Johannesburg carries a different mood. The driver’s voice over the intercom, a passenger stirring to check the time, a phone screen glowing, these details belong in the same frame as the koppies outside. A bus travel night video holds both scenes.
I once filmed a woman who woke at every toll plaza to ask if they had reached Pietermaritzburg. Her ritual gave the journey a rhythm the road alone could not provide. On another run, a teenager pressed her forehead to the glass and whispered a prayer when the bus passed a lonely church. Small acts like these define the footage.
This pattern repeats on every run. A bus travel night video gains depth when the camera catches both the koppies sliding past and the woman folding her jacket under her head.
Editing and Sharing Your Night Journey Film
Enhancing Footage With Colour Grading
Raw footage from a night ride hides its true character in shadows. Editing a bus travel night video begins with culling blurred frames and keeping only moments that carry a story. Colour grading transforms dim sequences into something readable. Pull down highlights to preserve the sodium glow of streetlights, then lift blacks to reveal the dark highway’s texture.
When you enhance footage with colour grading, work in small increments. A common workflow balances white balance first, then exposure and contrast. For a quick reference:
- Normalise white balance using a neutral window reflection.
- Set black level so the road retains depth without mud.
- Tweak saturation only on highlights to protect gloom.
Sharing your bus travel night video then becomes a matter of exporting at a consistent frame rate and uploading directly from your editing app. The mood you built through colour grading will carry over if you avoid crushing the compression.
Layering Sound for an Immersive Experience
Choosing the Perfect Background Music
The average night bus journey in South Africa spans over 400 kilometers, a distance that offers ample material for a compelling visual story. When you return to your editing suite, the challenge is to reduce hours of footage into a cohesive narrative that captures the essence of the ride. The first pass should focus on the structural integrity of your film, identifying the moments that form a natural arc. Resist the urge to include every technically perfect shot.
Choosing the perfect background music requires a different skill set. For a bus travel night video, the soundtrack dictates the emotional pacing more than the visuals do. A sparse, ambient drone can emphasise the loneliness of the open road, while a subtle rhythmic pulse might mimic the wheels on the tarmac. The music should underscore the tension between the quiet interior and the dynamic world passing by your window.
After you have locked the edit, consider the technical specs for sharing your work. The platforms you choose will dictate the encoding settings, but a balance between quality and file size remains essential for smooth streaming. When you share your film, pair it with a detailed description that includes your chosen keywords and location tags. This metadata is just as important as the footage itself for discovering an audience.
– Upload in 4K for future-proofing, but ensure a 1080p master for compatibility.
– Include subtitles for the ambient sounds and any dialogue.
– Add timestamps for key scenic moments or stops.
This approach ensures your vision translates clearly across different devices, keeping the viewer engaged. The final edit should feel like a continuous, breathing experience rather than a sequence of clips. Your goal is to transport the viewer into the seat beside you, sharing the unique perspective of the South African night.
Optimizing Video Titles and Descriptions
A strong title does the heavy lifting for any bus travel night video. It should tell a viewer exactly what they will see within three seconds. “Night Bus Through Mpumalanga, 400 Kilometres of Darkness” works better than a vague label. The description carries the weight for search engines. Include the route, the bus company, and the date.
I have found that these elements make a description work:
- Name the departure and arrival cities.
- Mention the time of night and duration.
- List notable stops or landmarks.
This context helps the right audience find your work. People search for specific places, not generic concepts. Keep the language direct. A viewer scanning on a phone needs clarity, not poetry.
Overcoming Common Challenges
Dealing With Window Reflections
Window reflections are a persistent problem in any bus travel night video. The glass reflects interior lights and hides the landscape. I press the lens hood flush against the pane to create a seal that blocks stray light. A dark cloth draped over the camera body also helps, though it draws curious glances from passengers.
The trick is to angle the lens slightly downward. This shifts the reflection away from the sensor. For stubborn glare, I use a polarising filter, rotating it until the interior fades.
- Shoot during brief tunnel passages to reset the exposure.
- Wait for the bus to slow, as vibration amplifies reflection distortion.
These small adjustments preserve the fragile clarity of the night.
Managing Battery Life in Cold Weather
A night bus is a rolling refrigerator, and cold air is the silent thief of power. Lithium batteries drain swiftly when the mercury drops, leaving a camera dead before the first highway lights appear. I keep my spare cells in an inner pocket, close to body heat, and swap them out only when the current battery is fully spent. This simple habit preserves the precious charge needed for the long hours ahead.
My workflow adapts to the conditions:
– Warm the camera by tucking it inside my jacket between shots.
– Carry at least two fully charged spares, rotated in sequence.
– Disable features like image stabilization when the bus is stopped.
The cold also slows the sensor’s response, making autofocus sluggish. I switch to manual focus during these spells. Monitoring the battery indicator becomes a ritual, a quiet negotiation with the freezing night. Each successful capture justifies the effort, ensuring the fragile magic of the journey is recorded. A managed battery means the bus travel night video remains uninterrupted, a seamless document of the dark landscape moving by.
Keeping Your Lens Clean in Dusty Conditions
Dust is a constant presence on South African night roads. The Karoo’s red grit finds its way through window seals and settles on glass within minutes. I keep a microfiber cloth in my shirt pocket, not my camera bag, because reaching into a rucksack while the bus sways is how lenses get scratched. A rocket blower clears the coarse particles first, then a gentle wipe in concentric circles.
The challenge multiplies when the bus stops at dusty terminals. Passengers board, luggage shifts, and fine particles swirl through the cabin. I leave the lens cap on until the bus resumes motion. Between stops, I inspect the front element with a small LED light, catching the haze before it ruins an exposure.
For a bus travel night video, a smudged lens turns every streetlight into a blooming aberration. The discipline of regular cleaning preserves the crispness of each frame. Dust is unremarkable, but it is relentless, and acknowledging it early is what keeps a bus travel night video from turning into a collection of soft, glowing ghosts.

0 Comments